Friday, May 27, 2011

Acorn Antique Show ~ Ogden, Utah.


This past weekend I was fortunate to get into the very popular Acorn Antique
Show here in Ogden, Utah.  The lady who puts this great show on had a few
dealers cancel on her and I was able to secure a spot at the last minute!  I
was very happy about this as it is next to impossible to get into this show as
she has all of her regular dealers there from one show to the next.  Yeah me!


I have been selling online for 10 years this June and I've never been in a show
before.  How crazy is that!  Here is a side shot of my booth.  I wanted to have
a spacious area for people to walk around in so I decided to have a u-shaped
booth.  There is nothing more annoying at an antique show than walking into
a booth and being afraid that you are going to knock things over!  I hate that!
Even as it was, I had people jockeying for room in here if you can believe it!


My front display got quite abit of attention from my antique glass claw foot
table to my cute mannequin.  Everyone wanted to buy the skirt (it's my own
personal one from Victorian Trading Company) so I decided to put a price on
it...that pretty much sealed the deal as it was quite an expensive skirt and
people probably thought I was nuts!  The lamp shade on her head was my
hubby's idea and it sold right away!  Darn, he's good!  (*_*)  The rose
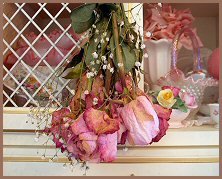
adorned lamp also got a LOT of attention, but no one purchased it.  Maybe
 they thought that it was just a little too over the top for them!


Lots of sweet things for sale here from bisque lamps to tole sconces to
tole trays, antique telephones, hobnail glass, antique chintz and more!


More fun STUFF!  My oversized Blue Boy and Pinkie prints darn near sold.  A
couple came back no less than three times to look at them, but it was a no
go in the end...darn it anyway!


The view on the other side of the booth.  This end was more of the French
style side and the other side had more of a Cottage style theme.


Love this pair of antique table chandeliers!


Lots of French style Cameo Creations pictures, a charming picture of a couple
playing cards and a lovely 1940's Cordey lamp from the Cordey China Company.


Love these adorable lamps!  They are made of bisque and have the most
adorable pink trimmed shades.  They did not sell (what the heck?!) so they
will be available for sale on the web site soon!


So there you have it...a little glimpse at my antique booth.  I took these pics in
about 30 seconds before the show started so they are not the greatest, but
you get the idea.  It sure was a fun show and profitable too!  That is always
a nice bonus!  (*_*)


On another footnote, I visit a lot of blogs out there on a daily basis and love
to leave comments, but I am one of the affected people these past four or
five days who have not been able to do so.  I'm not ignoring you gals, I just
can't leave comments!  I hope they get this fixed soon because I love letting
you all know how much I love what you are doing out there in blogland!

Have a GREAT long weekend!

~Stacy~

Tuesday, May 10, 2011

Outdoor Treasures at Treasures Antique Mall!


One of my favorite places to visit is Treasures Antique Mall in Springville, Utah.
It is about a 35-40 minute drive from my home in Salt Lake City, but it's
always worth the trip down there.  The best thing about this antique mall
is that there are TWO huge buildings side by side and a great outdoor area.


The yard area is quite big and it's a great place to find cool old stuff for
your yard and garden.  Noel, who is one of the dealers at Treasures, has
fantastic reproduction ironwork and garden decor and the selection is awesome!


One of the things that I am in the market for this year are some great
cast iron urns for in front of our garage.  Something like these ones
would be amazing!  They are so pretty and weigh about 200 pounds!
Noel has a really great selection of these urns both in a rusty finish
and an old weathered aqua finish.  Fantastic!


I love these pots and urns!  Aren't they beautiful!  I love all of the swags
and roses and check out those gorgeous large weathered aqua pedestals!


There are also some really great statues that feature
goddesses, cherubs and more!  Love this statue!


Another great treasure was this awesome wooden tote.


Here is another fabulous statue and a cute little girl statue.  Now
that I am looking at this picture, I see things in the background
that I didn't notice while I was there...hmmmmm...


Wow ~ look at all of this stuff!  I don't know about you, but I'm in
heaven just looking at it.  Those large arched pieces that you see
in the background are two-piece arches with attached benches
that come together in the center.  They are gorgeous!


There are all sorts of amazing things out in the yard from garden
decor to brass beds to antique washing machines!


More urns and statues waiting for their new owner.


Here is one of the completed archways with the bench attached.
Check out that awesome statue to the right!

I hope you have enjoyed my little tour of the Treasures Antique Mall
yard area.  I took tons of pictures inside the mall too which I will
show in an upcoming post or two.

Thanks for stopping by!

~Stacy~

Wednesday, May 4, 2011

My Kitchen Hutch ~ Decluttering In Progress!


In my quest for decluttering my home and preparing for an upcoming
antique show, I reworked my kitchen hutch the other day trying to find
things to sell while doing some decluttering in the process.

I know, you are looking at this and saying...that is decluttered?  Well, yes
it is my friends!  I took two whole boxes of STUFF from that crazy cabinet!
The appliances on the bottom shelf can now be accessed without having to
move everything to get at them, my cupcake collection is now on one shelf
and the top shelf has dishes that I can easily use without moving STUFF!


The top shelf houses pretty vintage dishes and a tole tray was added
to the back for abit of pretty eye candy.  I love tole trays, but I have
since removed them from my walls (trying to declutter you know!) and
they are sitting in a box downstairs waiting to be used again someday.


This pretty fabric is actually a valance from a vintage twin
bedroom set and it adds a little bit of "pretty" to the top.


Some of my cute vintage dishes including an old English pitcher,
a pretty teacup and a lovely Limoges covered butter dish.


A closeup shot of my vintage china pieces.


Every cabinet needs a little bling!  This pretty tiara was given to me
by my friend Paula who came over at 2:00 a.m. last Friday to watch
the Royal Wedding with me!  Isn't she nice!  The other little pieces
are vintage collar pins from long ago.


This adorable petite teapot was purchased from my friend Chris
over at Tutti Chic many years ago.  I still love it!


The middle row houses my cupcake collection that I make
and sell on my web site and in my Etsy shoppe.


A closeup of some of my faux confections.


You really can have your cake and eat it too!


This sweet antique card was given to me by my friend Paula (there she
goes again, she gives me the best stuff!) and I couldn't resist adding
it to this vignette.  I just love the look on her face!


The bottom shelf holds my pink appliances.  I used to have my mixer and
crock pot on my kitchen counter.  So glad to have them cleared off of there.


I must admit that I don't use my Kitchenaid all that much, but it sure looks
cute sitting there!  The tiered cake that you see is from an Etsy seller
named "Frippelous".  She has really adorable stuff!


I love my pink chopper and my crock pot and use them all of the time including
yesterday when I whipped up a big batch of homemade soup.  Yum!


Another view of the bottom half.  This cabinet is actually a newer one that I
have had for about 10 years or so.  I went to a shoe store, of all places, that
was closing down and they had shoes displayed on it.  I asked them if they
would be willing to sell it and they said yes!  I'm so glad I bought it ~ I love it!


I hope you have enjoyed having a peek at my kitchen hutch and
I wish you all a very lovely day.  Thanks for stopping by!


~Stacy~

Sunday, May 1, 2011

Pretty Pink Organza Flower Pin Tutorial

Fabric flower pins and hair accessories are all the rage and I don't see
them going away any time soon!  Today I thought I would give you a
quick tutorial on a variation of these lovely accessories.


The first thing you will need is some fabric.  For these pins, you will need
the type of fabric that will literally melt or singe the edges.  The fabric that
I am using here is a lovely lightweight organza fabric.  You can find this fabric
in the bridal section of any fabric store.  Silk is also great and I will show
you how to make ruffled silk rose pins in my next tutorial.


First, cut out your fabric into circles and how many circles you cut will depend
on how many layers you want your flower to have.  I cut out 12 circles for
this pin and used a small saucer as a template.  You can make it any size
you want, but you probably don't want to go any larger than a large saucer
so the flower retains its shape.  Don't worry about the edges.  As you can see,
my edges look rather ragged as I cut them out in a hurry, but it doesn't matter
as they will as be "burnt" smooth anyway.

Using a candle as I did, or a tea light, which is probably the better method,
take one layer at a time and gently rotate it above the candle flame using
both hands.  You will get the hang of this quickly, but it does take abit of
practice.  I have had burnt fingers and singed fabric!  You have to find just
the right height...too high and the edges won't melt and too low and you will
singe your fabric.  I also try to gently cup each layer upward while I am burning
the edges so it gives each layer a slightly rounded upward look.


As you can see, each layer starts to take on a petal-like appearance.


When you are all done, your petals will look something like this.  They don't
have to be perfect.  In fact, imperfection makes them rather nice I think!
When cutting your circles at the beginning, you can keep them all the same
size or make each layer slightly smaller than the last which I did.  I actually
cut five large circles, four slightly smaller ones and three smaller ones yet
to give the flower an authentic look, but it's just a matter of taste.


This is what happens when your fabric gets too close to the flame!  Be careful
when doing this, you don't want to start your table, or worse, your house on fire.
Be patient and let the flame work with you, not against you!  In case you do
make a few holes in your fabric, don't worry, you can always "hide" them in
between your other layers.


When you have all of your layers done, gather each size into a group.
You can now see the petals starting to form in this picture.  Then stack
each group on top of each other from the largest to the smallest.


Now it's starting to look like something!

You can now do any adjustments in the look of the flower by moving the
layers around so everything looks even.  If some of the edges are not to
your liking, use your candle again and redo any funny looking edges.
Remember, it doesn't have to be perfect!


Now is the time to sew the layers together and embellish your center.  The
possibilities are endless at this point and you can use a pretty vintage button,
new "bling" buttons or anything you desire.  I like to use pearl buttons or
seed pearl buttons for these flowers.


I actually like to sew the layers together with a few tiny stitches before
adding the center pieces, it just makes it abit easier.  Add your button
or pearls to the center with a few quick stitches and your center is done!


Your flower is almost complete ~ how pretty is this!
They remind me of a gorgeous ranunculus!


For the backing, cut out two circles of matching felt.  I like two circles
instead of one to give the back more strength and stability.


The circles should be abit smaller than the largest petal layer so they
don't show from the front or side of the pin.  I like to use my pinking
shears to give it a nice clean look.  Get out your hot glue gun and
glue the two circles together around the edges and in the center.


Now hot glue the felt backing to the flower.  Don't worry, it won't melt
your fabric!  Now you are ready to attach your pin to the back.  You
can pick up these pins in various sizes at any craft store.  Some people
like to sew these on, I do not!  Sewing them is so fiddely and using your
good old hot glue gun works wonderfully.  There is no way this pin is
going to come off, it is on there for good!  (*_*)


Here is your finished back.  Don't use too much glue or you will have a mess.
Use just enough to cover the back of the pin and press it down gently.


The finished product!

These are so fun and easy.  They are great to make if you are
wanting something to do while watching tv and you can have tons of
circles cut out in different fabrics and colors ahead of time.  Then while
the mood strikes you, just sit down and make yourself a pretty, romantic
accessory to wear this spring!

On my next tutorial, I will make a rose pin using silk fabric.  They are also
very easy to make and end up looking like a gorgeous floppy garden rose!

I hope you enjoyed this tutorial!

~Stacy~